PowerPoint To DVD
Basically, it’s a matter of getting a video signal out of the computer (NTSC video, not computer monitor video) and hooking that to a VCR/DVD player. There are special video boards that include this option, or there are outboard boxes called scan converters that convert monitor video to NTSC.
Keep in mind that what you get on a regular TV will be of lower resolution than what you see on screen, and the colors won’t be as crisp and saturated.
Followings are the methods of converting PPT to Video
|
For best results you should bring your power point project in our studio. We do these projects every day.
You can purchase the software but remember you will have to go through:
-
Learning Curve: This depends on how quickly you will understand the software interface.
-
Unforeseen Challenges: You have done every thing right according to the specs and instruction but
your computer is crashing during a DVD burning process (blue screen). Or it locks up when you
were going to perform a certain step.
Remember, the software manufacturer will never mention these challenges. -
OR: You successfully were able to burn a DVD, but now audio and video are out of sync. or there is no
audio on the dvd. Or the DVD shows you a black frames where you entered dissolve effect in PPT.
If you have not successfully tried any of the above methods before and you have a deadline to finish a job,
we can definitely assist you to finish your project.
Call us at (866) 729-3636 for any further question.
THROUGH THE COMPUTER:
Here are the following steps that you should do before going into more elaborate methods
Step1: Look for the video output jack at the back of the computer (RCA or Y/C). Some computers do have this kind of jack.
Step2: If you have this jack connect it to the Video input terminal of the VCR in which you want to record. Most of the new Pentium computers are coming with Audio output jacks which is called mini output port.
Step3: Take the Audio output from this jack through appropriate connector cable. And connect this cable to VCR. Make sure your VCR is set to the connected input .
Step4: Connect the VCR output (antenna or RCA) to the input terminals of your TV. And switch the TV to the corresponding
input.
But if you don’t have the computer with NTSC Video output, then we have another expensive method
You should buy scan converters only and only if you are doing projects more than once.
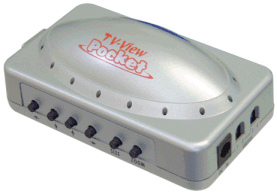
The scan converters are not cheap. They range from $150.00 to $15,000. If your project doesn’t require lot of resolution, you may buy these scan converters from the local stores like CompUSA or Microcenters. These converters are hooked at the monitor output terminal of your computer at the back. Through processing, they convert Computer output to Video output. Some of these cheap converter boxes have S-Video output for higher quality. But remember, our VCR should also have that type of output.. Otherwise use the regular RCA type output.
The audio portion is recorded with the audio output coming directly from the audio card in the computer. You will take line output. If you have prepared pictures project that you want to display in the wedding reception or the event doesn’t need high quality resolution, I would recommend buy the one that comes with RCA out put from CompUSA. They might be less than $100.00
.
AverKey converters are less than a $100.00.
If your presentation is for professional job or you think quality of the project is important, don’t use this method.
WARNING: (This is an amateur method of putting computer projects on Video. We do not recommend it)
Here is the procedure:
-
Place your desktop or laptop in a very dark room. Have your camera in front of the monitor.
-
Make sure your monitor and camera are at right angle to one another and edges of your monitor
-
If your camera have iris control, change it to allow ambient light to pass through the camera. So that the white areas of the image don’t become too white.
-
If you are getting flickers while shooting, it will be difficult to remove specially with the consumer cameras. In the professional camera there is an option of changing the frequency setting that match with the monitor frequency. When the flicker is gone or you see no flicker on the monitor, its mean the monitor and the camera are synchronized and you can shoot a good image.
Remember:
A. Always record in the camera itself.
B. Better the format of the camera, better will be the image.
C. Place the camera as close to the monitor as possible and both should be in the same line.
D. Room should be as dark as possible. The outside light is the enemy of the light that is coming from the image itself.
If you think none of the above methods work for you, rent the converter and do it yourself or call one of AV companies to
get the service.

